Now that Windows officialy released Windows 11 for more than one month, I feel safe to upgrade my personal desktop. After years of upgrading my own, my family and friends desktops I feel like I found the most comfortable way to upgrade your Windows system.
It looks something like this:
- Back-up all my personal files (excluding installed software)
- Create a Windows 11 USB
- Nuke my main drive with Windows 10 and install Windows 11 from the USB
- Restore all my personal files (excluding installed software)
- Install all the software that I need (manually)
- Done!
ACKNOWLEDGEMENT
- This guide was heavily inspired by a Tech Republic article, give it a look.
- Whenever I say “all of your personal files” I mean all of the diretories that are specified in your File History settings.
- I am not responsible for any lost files, programs or whatever ;)
🆚 Why Windows File history, a file level back-up?
For my daily back-up solution I prefer an Image level back-up over an File level back-up. This is mainly because of the ability to quickly restore my entire PC from a single file. A image level back-up sofware I recommend is Veeam end-point backup. But this guide is not about restoring your PC after a disaster but restoring your PC after a Windows upgrade.
This is where file history shines. With Windows File history, a file level back-up, you only back-up and restore your files. This is perfect for what we want, because we want the following:
- a fresh Windows 11 install.
- no software/any config from Windows 10.
- really just our files.
💾 Backing up all personal files with Windows File History
Open “File History or access it through the controlpanel with the following path: Control Panel\All Control Panel Items\File History
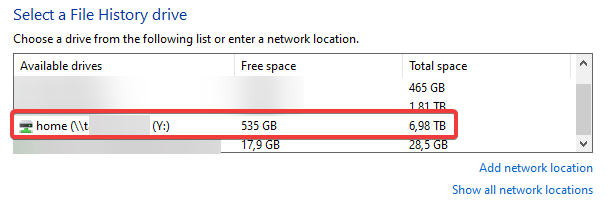
Click Select Select drive and your avaiable disks for file history will show up. In my case, I have a NAS so I added it by clicking Add network location.
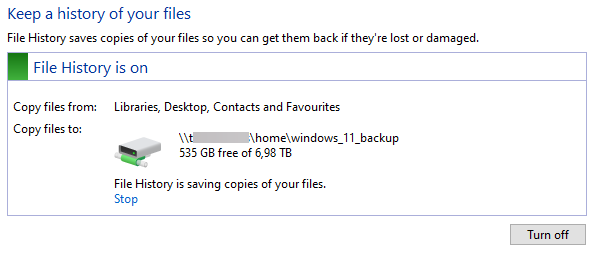
After I selected the drive I want to use for File History, it immediately starts backing up your personal files. This might take a while (for me, 300GB took about 2-3 hours).
🐤 Creating the Windows 11 USB
I will not go too deep into explaining how to do this because there are plenty tutorials for this online. My preferred way is to use the Windows Media creation tool. It formats the USB and throws a bootable Windows 11 installation on it. Double-triple-check if you REALLY made a file history back-up, shutdown your PC and boot up from the USB.
🖥️ Installing Windows 11 and nuking my disk
When you boot from your new Windows 11 USB, you will see the usual install screen. When it asks you to choose a type of installation, select Custom: Install Windows only (advanced). Once you click next, find your boot disk, for me that is Drive 0, and Delete all the partitions until it only shows Drive x (x = your boot disk) Unallocated space. Now select that unallocated space and click next. It will install Windows on that disk with fresh partitions.
↩️ Restoring my personal files
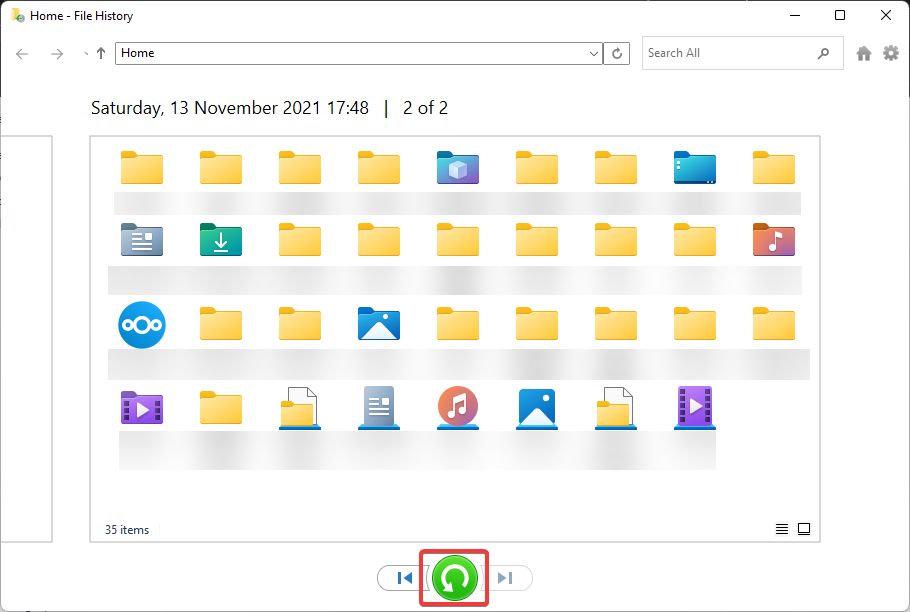
Open up File History and on the left menu click on Restore personal files. A new window will pop up and here you can see all of the folders on your back-up. Check if you have the most recent back-up (date is in the left top) and click on the big green restore button.
 It will ask you if you want to replace the files in the destination, click on
 Replace the files in the destination.
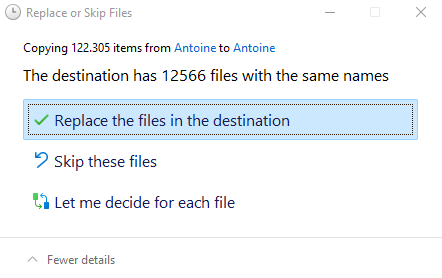 This might take a while, I had 300GB to transfer so it took about 2 hours. Check if your files are restored correctly by random samlping to verify the files are restored.
✒️ Final words
Now you have a clean Windows 11 setup with all of your personal files! None of your previous settings/software will be included in the file restore (unless you signed in with your Microsoft account). I also like to use this method every half a year to keep my desktop nice and snappy.